2. Register the game
💡Info
The complete code for this step can be found in the branch named
step_02.Register the game
To easily onboard players onto Immutable Runner, you can use Immutable Passport for authentication and a web3 wallet. However, you must register the game in the Immutable Hub before using Passport.
- Go to the Immutable Hub and follow the instructions to log in.
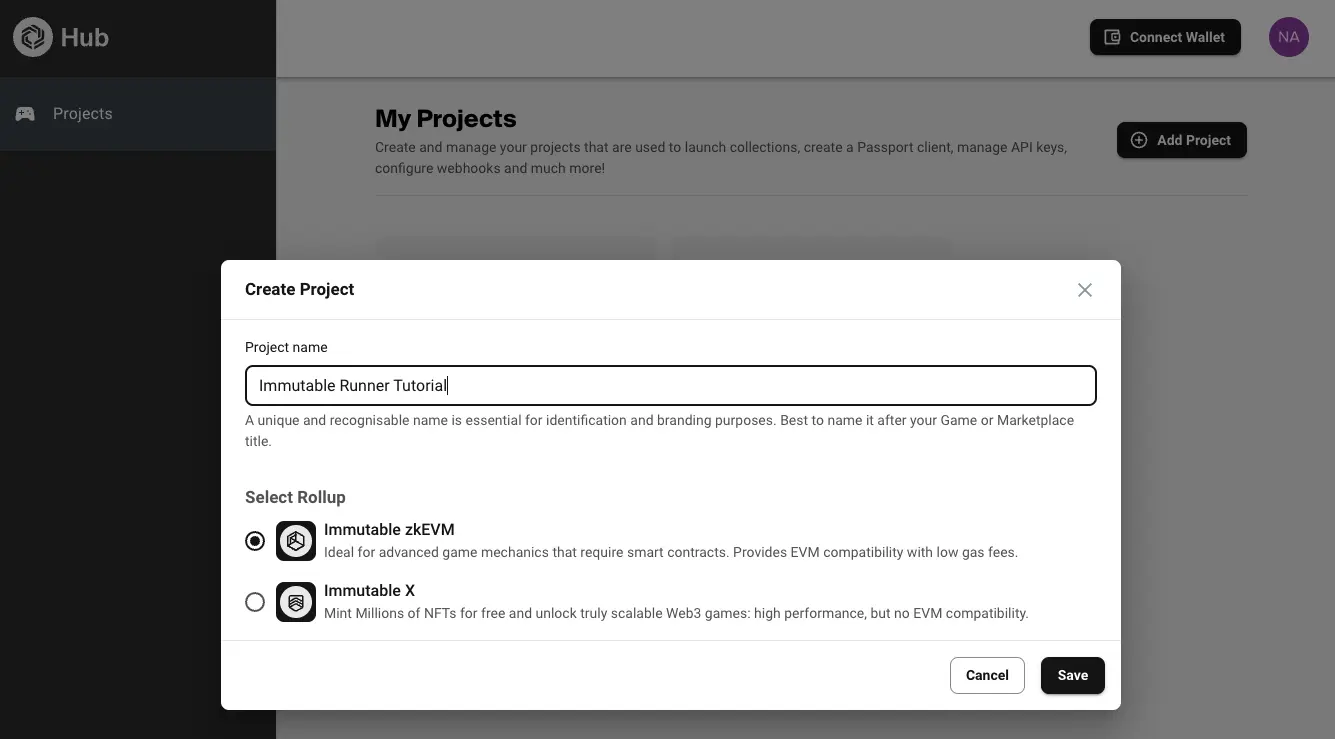
- Once logged in, in the Projects tab, click Add Project.
- Enter the project’s name, select Immutable zkEVM and click Save.

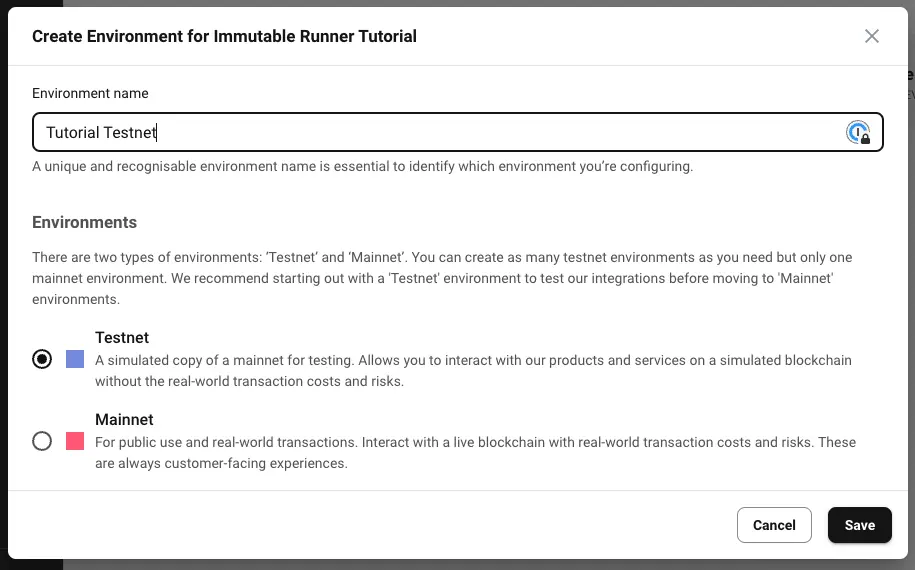
- Enter the environment’s name, select Testnet and click Save.
⚠️Warning
Make sure to select the Mainnet environment when launching your game on the mainnet.

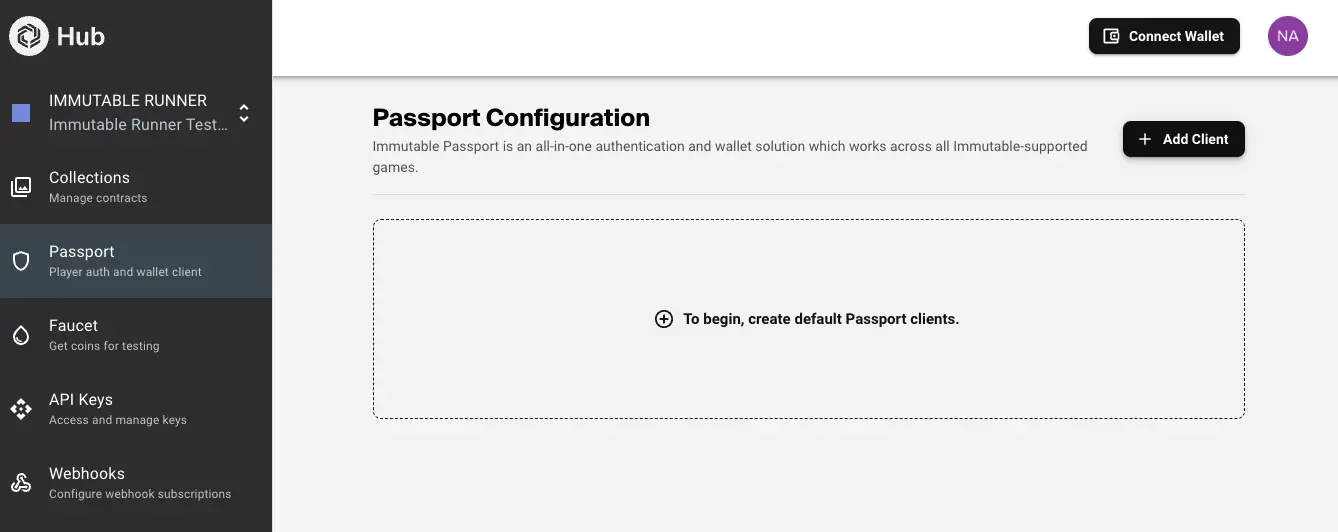
- In the Passport tab, click Add Client.

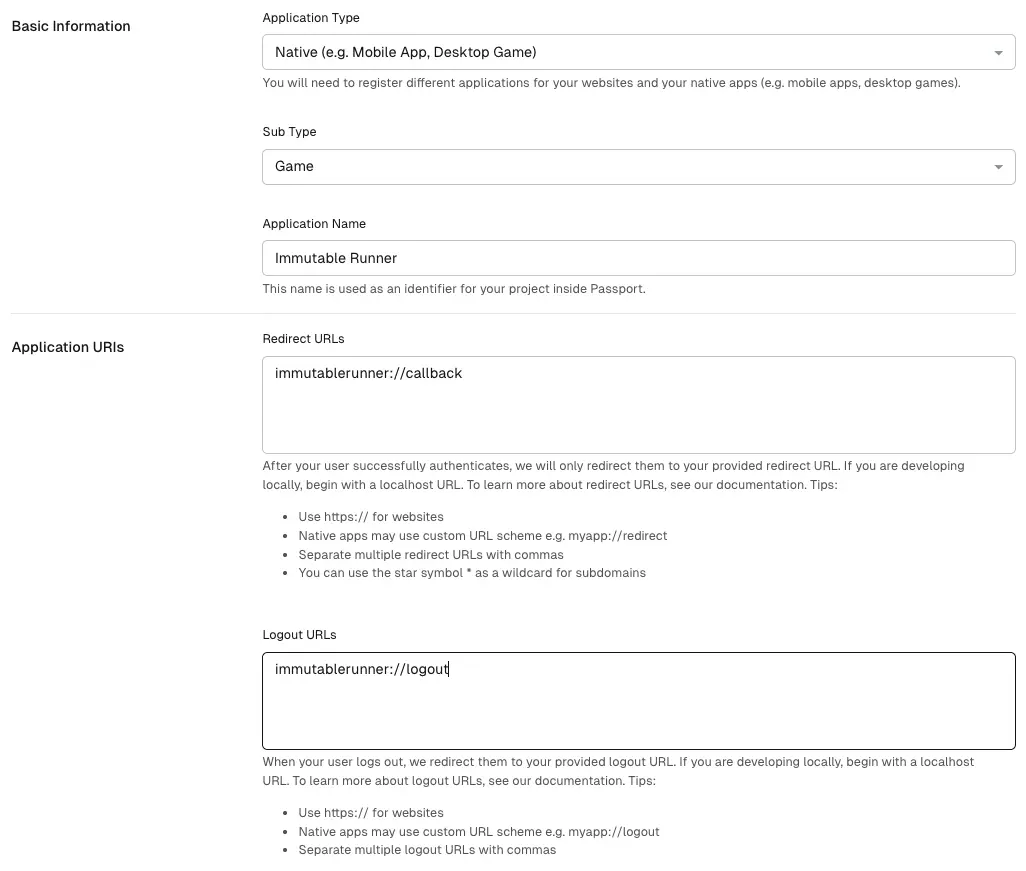
- Choose Native (e.g. Mobile App, Desktop Game) as the Application Type.
- Enter the game’s name in the Application Name field.
- The Redirect URLs and Logout URLs are mandatory fields. However, you
won’t be using them right now. They will be utilised in
step 3. For now, enter
https://localhost:3000/into both fields.

- Leave the Web Origins URL blank, as it’s not required for Unity games.
- Click Save Changes.
- When you return to Passport Configuration, you will find a Passport client and Client ID ready for integration into the game.

To learn more about each field, please refer to this link.
Initialise Passport
Now, you can use the Passport client to initialise Passport in the game. You will add Passport initialisation to the main menu screen.
Assets/Shared/Scripts/UI/MainMenu.cs
using Immutable.Passport;

namespace HyperCasual.Runner
{
    public class MainMenu : View
    {
        Passport passport;

        async void OnEnable()
        {
            ShowLoading(true);
            m_StartButton.AddListener(OnStartButtonClick);

            // Initialise Passport
            string clientId = "YOUR_IMMUTABLE_CLIENT_ID";
            string environment = Immutable.Passport.Model.Environment.SANDBOX;
            passport = await Passport.Init(clientId, environment);

            ShowLoading(false);
            ShowStartButton(true);
        }
    }
}
Replace YOUR_IMMUTABLE_CLIENT_ID with the Client ID you obtained from the
Immutable Hub.