Deploy preset contracts via Immutable Hub
This quick tutorial covers everything you need to do to launch a standard contract (ERC-721, ERC-20) via the Immutable Hub.
Prerequisites and setup
Setting up Immutable Hub account and zkEVM project
Join Immutable Hub
Immutable Hub is the admin panel and learning platform for Immutable developers. Sign up typically takes between 3 and 5 minutes and you’ll be asked a few simple questions to help us understand what you’re building.
Immutable Hub
Use the Immutable Hub to create a zkEVM project
Once you’ve set up your Immutable Hub account, you can create a project. Create a project and fill in the following in the setup flow:
- Project Name: the name of your application (e.g. My Project)
- Project Rollup: Immutable zkEVM
- Environment Name: anything you want (e.g. Testing)
- Environment Type: Testnet
Games should initially build on our testing/testnet environment before switching to production/mainnet.
Once complete, you will see many features on the sidebar where you'll configure your Immutable integration for this project and environment.
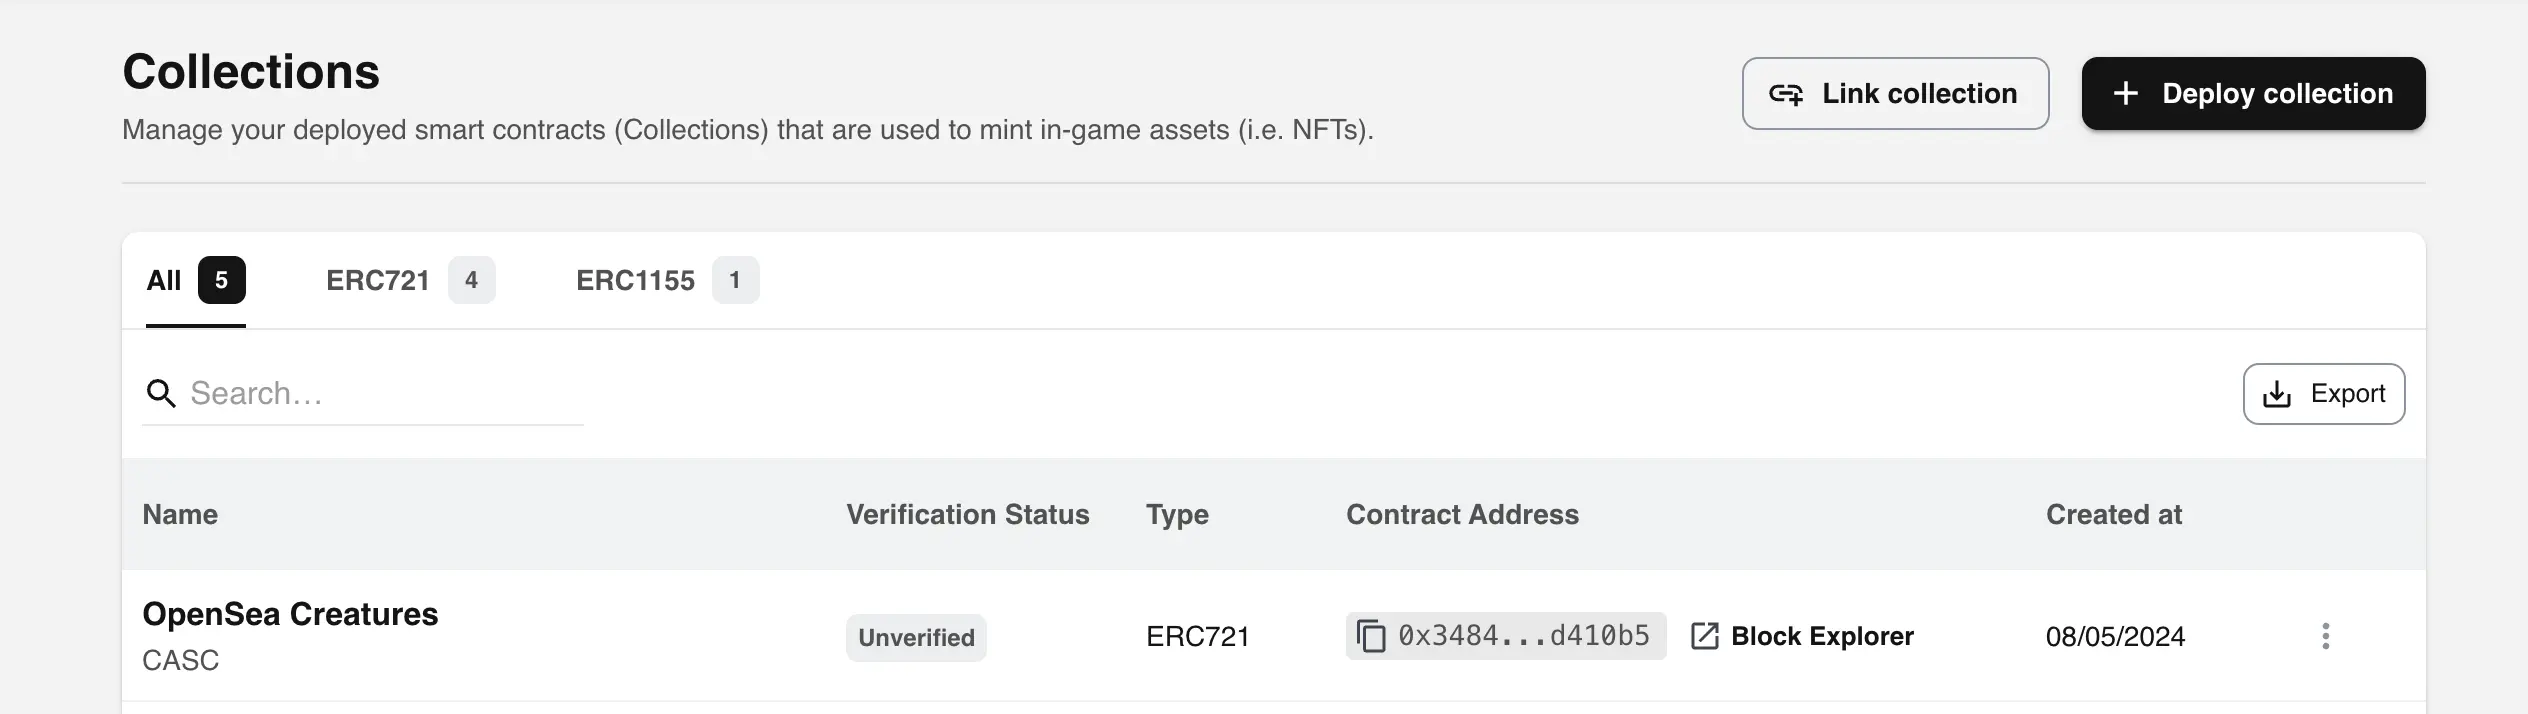
Deploy an ERC-721 (Collection) preset contract via Immutable Hub
For a comprehensive guide, visit this link.
Deploy an ERC-20 (Token) preset contract via Immutable Hub
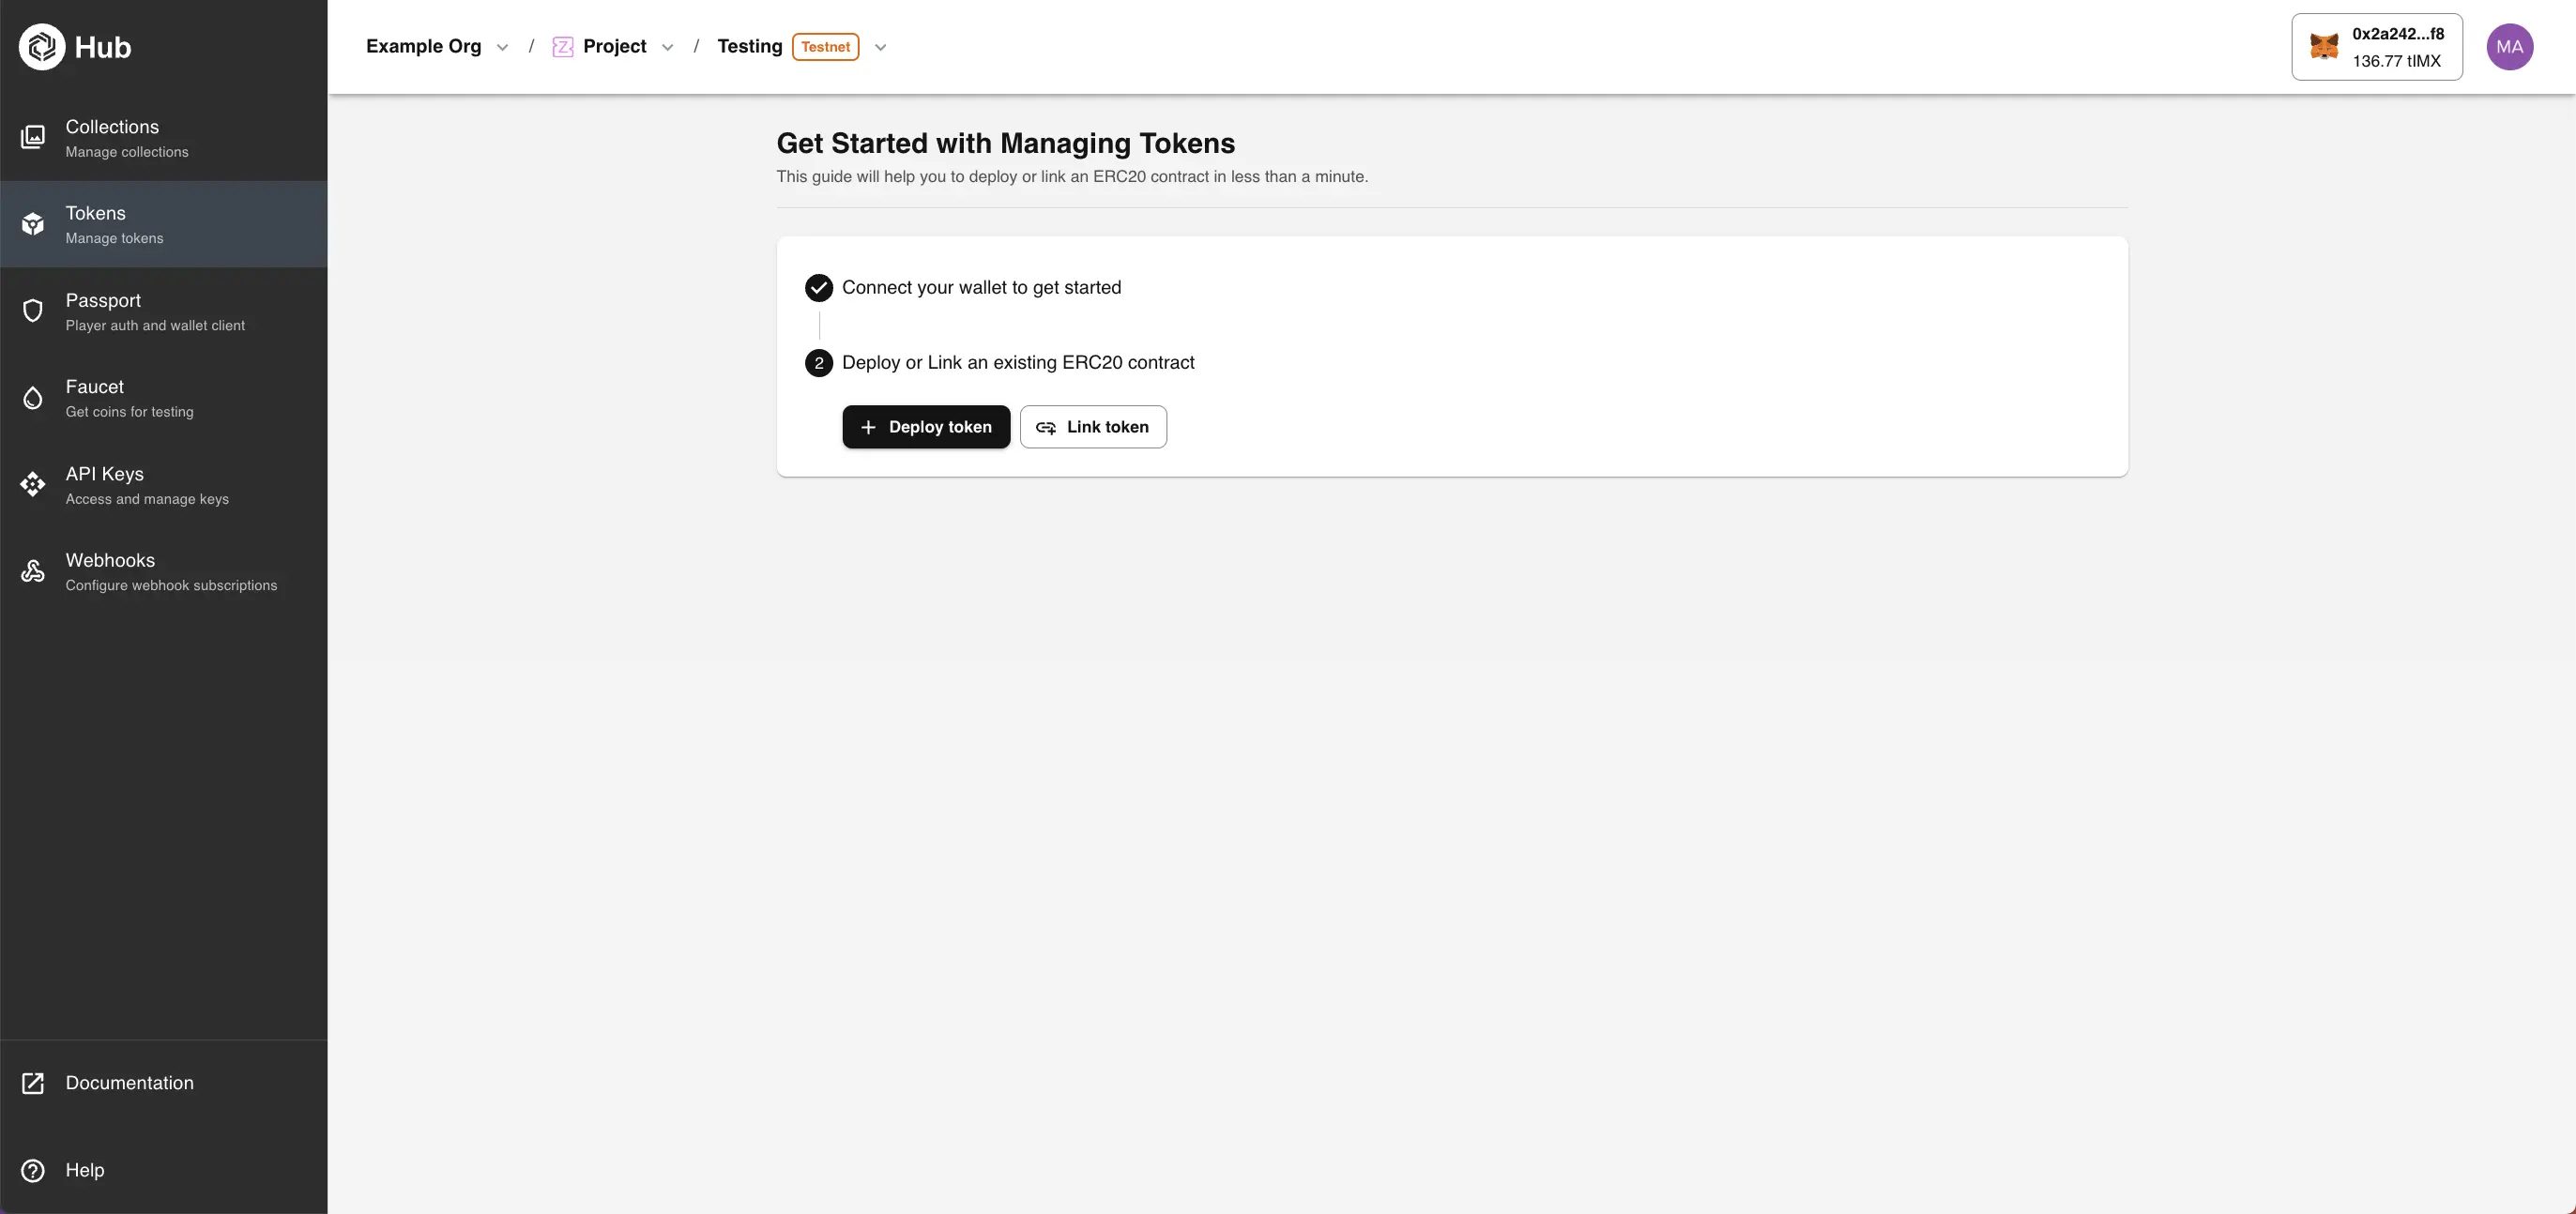
Go to the project you've previously set up in Immutable Hub.
Connect your minting Metamask wallet by clicking the Connect Wallet button on the top right menu of Immutable Hub and navigate to your project and environment.
In the Tokens submenu, click Deploy token:
- Create a
Namefor your token - Create a
Symbolfor your token that is 2-3 characters long - Enter the
Max Supplyof the token you want to deploy - Paste the
Image URLthat you want for your token
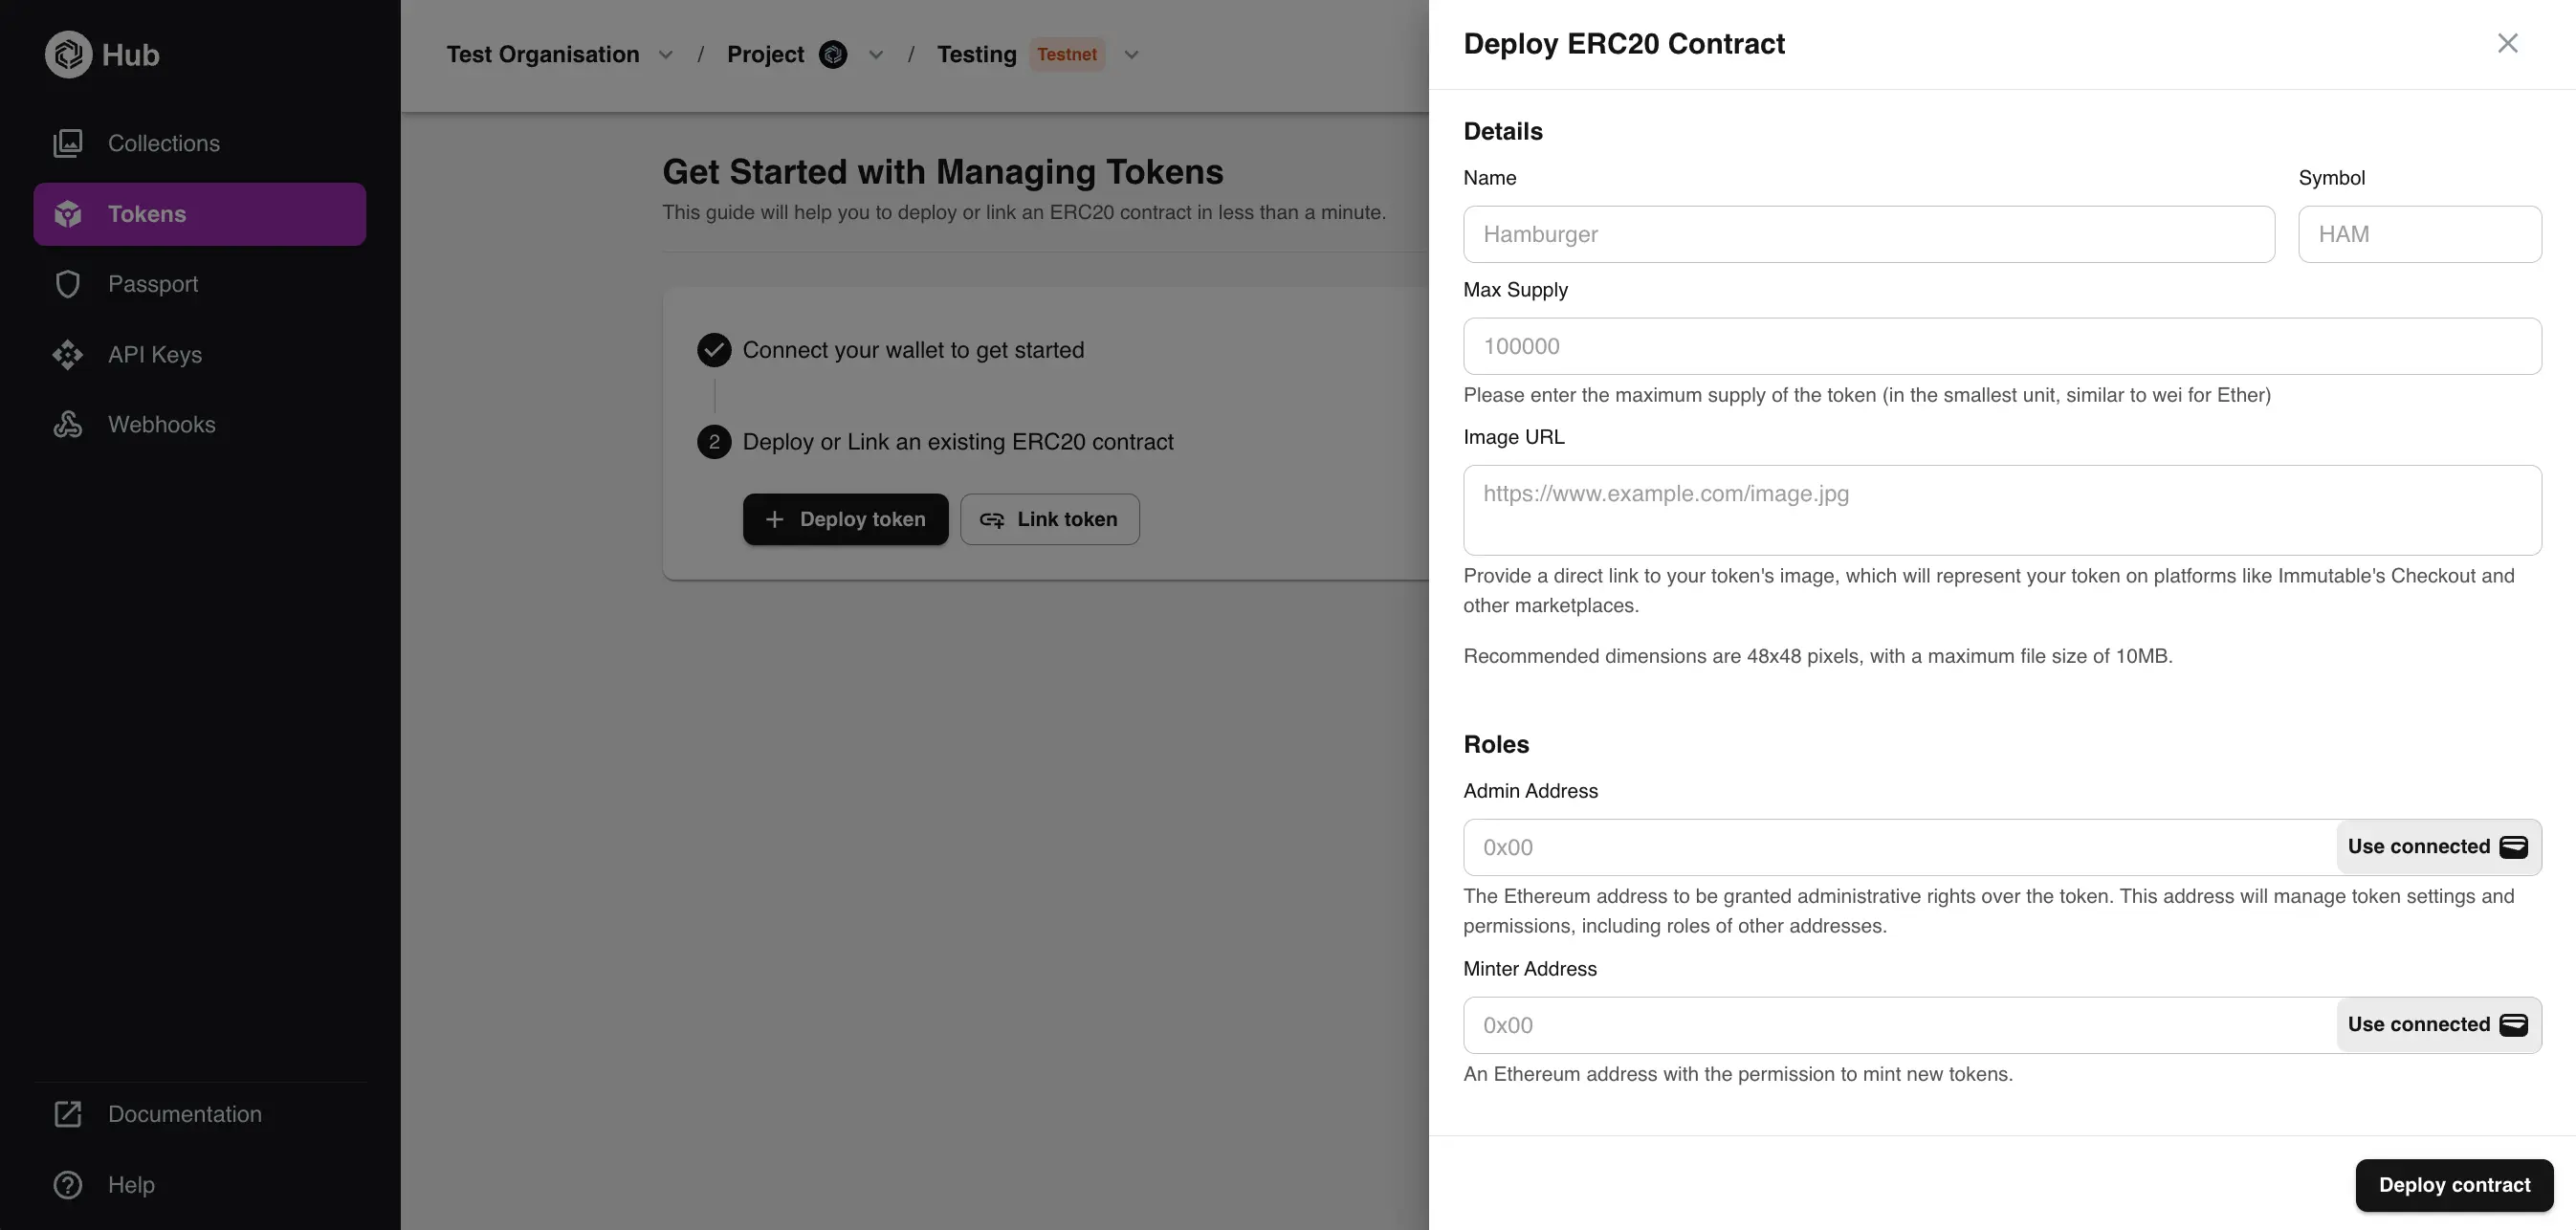
- Enter the
Admin Addressthat is a valid wallet address that will be able to manage the contract - Enter the
Minter Addressthat is a valid wallet address that will have minting privileges - Click
Deploy contract
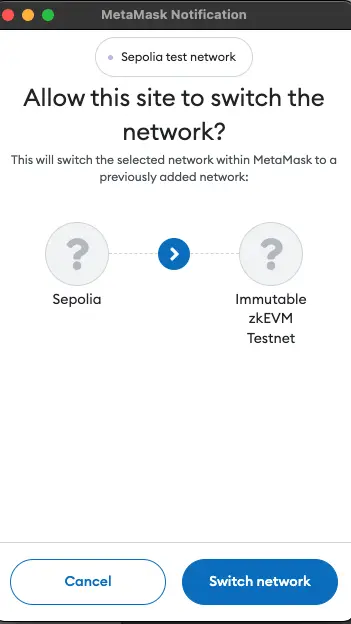
Hub will automatically check your wallet's connected network. If your network is not already connected to the respective chain (IMX zkEVM Testnet or IMX zkEVM Mainnet), then you will prompted in Metamask to switch. Here, select Switch Network. If you are deploying on Testnet, tIMX will be automatically given to you via our faucet as part of the process.
- You will be prompted to sign a transaction with your wallet. This step costs gas and will deploy your contract.
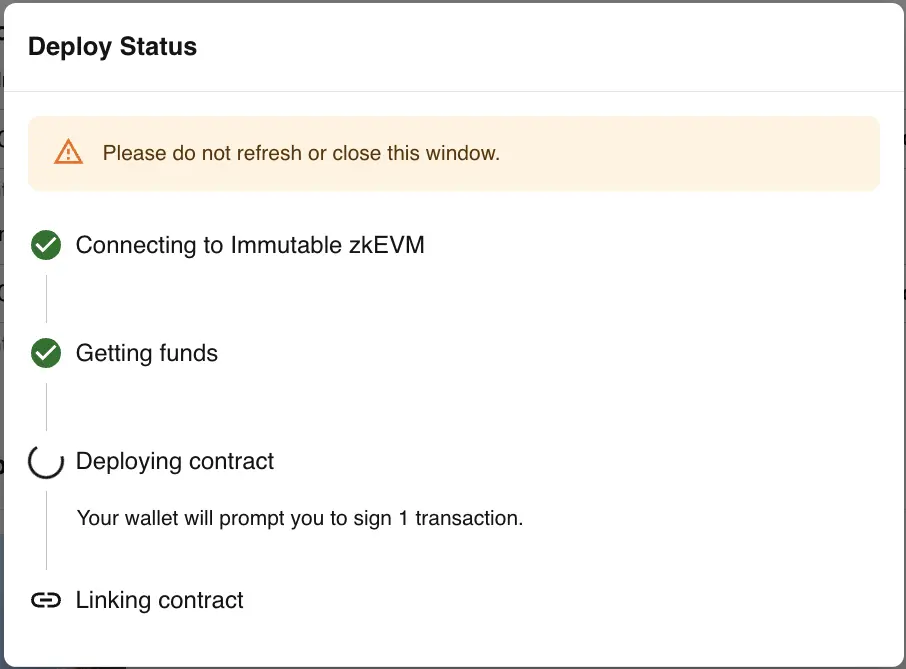
- You will be prompted to sign a message with your wallet. This step is gasless and will link your token to your project's environment.